Pages

Showing posts with label meal. Show all posts

Wednesday, May 18, 2011

Italian inspiration on a cool summer night

While Blair's romantic future may be ever in question, while Serena's hips appear ever wider in ever shorter skirts, and while the number of characters Gossip Girl writers manage to write in simply to dream up an elaborate, multi-character, history-spanning deception will never cease to shock, Monday night dinners always satisfy.

This Monday marked both the first Monday night dinner of the summer as well as the last Gossip Girl episode of the season. The meal had to be fresh, part cool and part warm to fit the unseasonable weather, and most importantly, use up a hella lot of basil and other market goodies in the fridge. This is a 3-part menu so get ready for dinner party ya'll.


I'd picked up some large, green kohlrabi from my favorite farmers at Cedar Grove Farm as well as leeks, purple and green asparagus, sweet onions, and radish peas from other Athens Farmers Market vendors. It seemed only fitting to dream up a cool, raw salad to match the hot summer days ahead. I've become obsessed with kohlrabi lately, because they are in season and because I only just discovered how tasty they can be when eaten raw. And radish peas were a wholly new discovery. Apparently, radishes, when left to seed, produce pea-like pods that taste like strong radishes. In Asia, it is more common to cultivate radishes for this purpose than for the radishes we know and love here.


Cold Kohlrabi and Asparagus Ribbon Salad with Radish Peas and a Lemon Vinaigrette


2 large kohlrabi heads, julienned
Bundle of asparagus spears, purple and green if possible, peeled into ribbons
Small bag of radish peas, chopped into small discs
2 small leeks or 1 medium, julienned, optional
Shaved parmesan

Vinaigrette amounts estimated to taste
1 lemon, juiced
2-3 Tbsp. olive oil
2 tsp red wine vinegar
salt and pepper to taste


1. Julienne the kohlrabi using a food processor if you have one. Strip the asparagus into ribbons using a vegetable peeler, slicing off the heads to serve intact. Slice radish peas into small discs. Use as many as you prefer to make the salad pack the punch you desire.
2. If a touch of sweetness is something you crave, thinly slice small leeks into matchsticks and caramelize on medium low heat in a touch of olive oil or or truffle oil. I threw in a few fresh tarragon leaves as well. Allow to cool before adding to the salad.
3. Whisk together the vinaigrette ingredients, adding more olive oil or vinegar to your taste. 
4. Toss all ingredients together and serve with shaved Parmesan on top.


Now, if we were really Italian, we'd be going in reverse order, eating our salad last, but it's often at my house that whichever dish is done first, is eaten first. We did begin the evening with a bottle of wine and some crostinis. These could also be eaten as more of a main course as larger open-face sandwiches (which I did tonight with the leftovers.


Broiled Crostinis with Mozzarella, Pesto, Marinated Tomatoes and Fresh Basil


Half loaf of fresh bread, sliced thinly - we used a semolina loaf from Alfredo's Bread
3 tomatoes, sliced
Mozzarella, sliced into discs
Handful fresh basil
Balsamic
Rosemary

Pesto - makes extra for freezing and leftovers
5 packed cups of basil
4-5 cloves garlic
1/4 cup pine nuts
scant 1/4 cup sliced almonds
1/4 cup Parmesan cheese
1/3 cup olive oil, add to taste up to 1/4 cup
salt and pepper to taste
pinch of cinnamon


1. Marinate sliced tomatoes with balsamic vinegar and rosemary. 
2. Pulverize nuts and garlic in the food processor. Add the basil, Parmesan, salt and pepper, pinch of cinnamon. Pour the olive oil in as you process. Taste and adjust.
3. Turn oven on broil. Slice bread thinly into squares of half loaf slices; remove crusts. Arrange bread on a baking. Spread pesto on each slice. Top with one tomato and one tomato slice.
4. Broil until mozzarella is slightly brown and bubbling, check after 3 minutes. Slide a piece of fresh basil under each tomato and serve immediately.


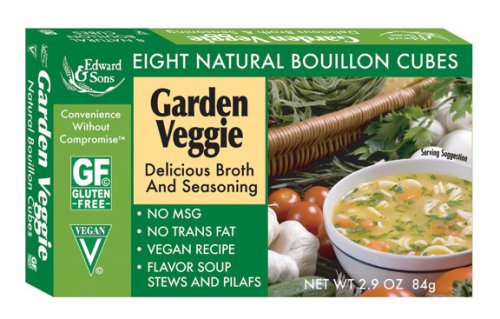
At this point we were 2 bottles of wine in and ready for a warm soup merging classical technique and seasonal tweaks to adjust for the unusually cool evening. This variation on a ribollita truly hit the spot, with layered notes of flavor, using greens on hand in the fridge, an experiment with veggie boullion and a punch of vegetarian goodness. In place of kale, I chopped up kohlrabi and beet greens. After thumbing through my copy of Super Natural Cooking Everyday, I decided to take Heidi's advice and use bouillon cubes instead of buying veggie stock since I didn't have any homemade on hand. I grabbed a veggie bouillon from the organic section at Kroger and I couldn't have been more pleased with the flavor and the price.


Vegetarian Ribollita

1/2 pound dried Great Northern beans
Kosher salt
1/4 cup olive oil
3 small yellow onions, diced
1 cup chopped carrots, about 6 small organic carrots
3 stalks chopped celery, chopped
6 cloves minced garlic
1 tsp. freshly ground black pepper
1/4 tsp. crushed red pepper flakes
3 tomatoes, chopped
Roughly 4 cups coarsely chopped greens - I used kohlrabi greens (2 bunches) and beet greens (1 bunch)
1/2 cup chopped fresh basil leaves
3 bouillon cubes in 6 cups water or 6 cups vegetable stock (I recommend Edward & Sons Garden Veggie Bouillon Cubes)
Roughly 3 cups foccacia bread cubes
1/2 cup freshly grated Parmesan, for serving

1. Soak beans overnight or boil beans for 3 minutes and let soak for 1-2 hours. Drain. Bring the beans to a boil in unsalted water then reduce to simmer for 45 minutes. Add about 1 tsp. salt and cook for another 10-15 minutes or until desired tenderness. Save the cooking liquid.


2. Meanwhile, heat the oil in a large stockpot. Add the onions and cook over medium-low heat for 7 to 10 minutes, until the onions are translucent. Add the carrots, celery, garlic, 1 Tbsp. of salt, pepper, and red pepper flakes. Cook over medium-low heat for 7 to 10 minutes, until the vegetables are tender. Add the tomatoes, greens and basil, and cook over medium-low heat, stirring occasionally, for another 7 to 10 minutes.


3. In the bowl of a food processor, puree half of the beans with a little of the cooking liquid. Add to the stockpot, along with the remaining whole beans. Add bean cooking liquid (to cups) to the stock to make 8 cups. Add to the soup and bring to a boil. Reduce the heat and simmer over low heat for 20 minutes.


4. Add the bread and simmer for 10 more minutes. Taste for seasoning and serve hot in large bowls sprinkled with Parmesan.


 Buona sera readers! Buon appetito!

Thursday, February 10, 2011

Pizza

Homemade pizza is one of those things that always serves your deepest craving. Not only is it delicious and generally much better than pizza you'd buy, it's a great way to use up vegetables left in your fridge, it's easy and fun to do with friends, and it allows for endless creativity.

I want to share some of my past pizza concoctions while reminding you that honestly, the sky is the limit when it comes to homemade pizza. I can't really imagine any combination of ingredients that would not work out based on any reason besides personal distaste.

First, the crust - thanks to grocery stores like Trader Joe's and Publix, it is as simple as a quick drive to the store and a couple of bucks to obtain ready-to-bake pizza dough. This is a great option when you're in a hurry. One time I even used an Irish Soda Bread mix as a dough. Of course, if you have time to make dough from scratch there are many options that require varying lengths of time to rise, such as this one, this one and this one, just to throw out a few. Everyone has a favorite recipe, so I encourage experimentation to find the best for you. Personally, I like the taste of homemade dough better than premade, possibly due to the use of bread flour or maybe just because it's rewarding to make your own. Keep in mind that homemade dough can be kept in the fridge about 3 days and in the freezer for up to 3 months. Be sure to defrost overnight in the fridge or on the counter for a few hours before rolling out and cooking.

The following dough recipe is one I used based on positive reviews, quick rise time and the inclusion of bread flour instead of all-purpose.

Quick Homemade Pizza Dough
Yield: 1 large crust

1 (.25 ounce) package active dry yeast (Be sure to get Active Dry and not Instant!)
1 cup warm water (About 110 degrees F or about 2 minutes in the microwave)
2 1/2 cups bread flour, plus more to knead in if too sticky
2 tablespoons olive oil
1 teaspoon salt
2 teaspoons white sugar


Instructions
  1. In a small bowl, stir to dissolve yeast in warm water. Let stand until creamy, about 10 minutes.
  2. In a food processor with a dough blade or a in a large bowl, combine 2 1/2 cups bread flour, olive oil, salt, white sugar and the yeast mixture. Beat or stir well until a stiff dough has formed. Cover and rise until doubled in volume, about 30 minutes. Meanwhile, preheat oven to 350F.
  3. Turn dough out onto a well floured surface. Form dough into a round and roll out into a pizza crust shape. Add flour as needed to keep from sticking. 
  4. Cover with your favorite sauce and toppings and bake in preheated oven until golden brown, about 20 minutes. 
And now, what you've all been waiting for, here are some of my favorite pizzas of the past. Remember, beyond toppings, you are welcome to experiment with cheeses and sauces. Mozzarella, shredded Italian cheese mixes (Asiago and Parmesan, for instance) and feta are always good for cheese. For sauce the options are boundless: regular store bought pizza sauce, plain canned tomato sauce, alfredo sauce, just olive oil and no sauce, pesto, or any homemade concoction. And for me, the addition of minced garlic, caramelized onions or mushrooms is never a bad idea, as well as seasoning with various spices such as basil or oregano.

1. Broccoli, garlic, feta, shredded mozzarella, and pesto
2. Olive oil (no sauce), mozzarella discs, basil and fresh or sun-dried tomatoes
3. Roasted sweet potatoes cut into discs with a bit of brown sugar, caramelized onions, garlic, no sauce, and shredded mozzarella
4. Mushrooms, sliced bell peppers, red onion, Mozzarella or Italian shredded cheeses, and pizza sauce
5. Spinach, mushrooms, pizza sauce, and garlic

Don't forget calzones!
6. Tomato sauce, thinly sliced ham, pineapple chunks, and Italian shredded cheeses

7. Nutella, marshmallow fluff, Bing cherries, and bananas


Emily and Charlie passed out from how good pizza is!

What are some good pizzas you've made?

Friday, January 28, 2011

Last Remnants of the Garden


Last week I pulled up the last bits of my winter garden to prepare for cover crop planting. Incredibly I found a treasure trove of radishes that had flourished through the cold. Some were HUGE!

It was a true garden mystery though because I had thought, according to my little garden chart, that these were turnips the entire season. I am still baffled, even though I know it must have just been my mistake.

So what does one do with pounds and pounds of radishes? I will offer some suggestions.

Now that's a lot of radishes
My whole life, I never thought of cooking radishes. To me, they were simply a delicious snack to eat raw, perhaps in a salad. Then one day I roasted a radish (just tossed whole in olive oil, salt and pepper; cooking a 400 degree oven until fork tender), and my world changed. It started when I purchased a "Turbo radish" at the farmer's market - which is I tell you a strange beast. The woman who grew it suggested roasting. In my opinion, regular radishes are less bitter when roasted, but these crazy black radishes are worth a try.


Anyways, the point is, cooked radishes are delish. And one day in the shower I imagined how yummy caramelized radishes would be, ala caramelized onions. I had purchased some farro the week prior at the local co-op, so I planned a caramelized radish and farro dish. Farro is a pretty cool grain with a unique light crunch about it.

1. Prepare the farro according to package directions. Use stock if you want more flavor.
2. Carmelize slices of radish, half a red onion or a few boiler onions, and garlic in olive oil at medium-low heat with a little salt and pepper and maybe a touch of brown sugar. Feel free to add any vegetables you have on hand and season to your pleasure. This is very much a "contents of your fridge" kind of meal.
3. Stir together and serve. 


Has anyone ever caramelized radishes or other vegetables besides onions before? I am very interested in perfecting this sweetening art.

Monday, January 17, 2011

Fiesta en Diciembre! Aye! Aye! Aye!


If there's one thing South American cultures understand and one thing I miss terribly during winter, it's color. Vibrant, sun-soaked, primary colors that take your breath away. Such passion for color and rhythm and margaritas can only mean an incredible zest for life that shows through their food. I hope to one day achieve this culmination of taste and passion. But for now, my attempts are at least muy delicioso!


 To use up Christmas dinner leftovers this year, I wanted to try out a Turkey Chilaquiles recipe I had seen last year in ReadyMade. So of course I decided to turn it into an all out Mexican feast. Chilaquiles are a traditional Mexican dish and also one of the vocab words from high school Spanish class that always sticks in my memory along with Bacalao and Guachinango for their nice rhythmic sounds.

Margaritas are a must for a Mexican feast in my opinion. And with that comes the need for a bit of kosher salt and limes. I like to dip the rim of the glass in a shallow bowl of lime juice and then dip it again in a plate of kosher salt. Don't be embarrassed to lick the glass.

However, if you want to go a little simpler, La Playa Cerveza at Trader Joe's is only about $3.50 for a 6 pack. Not bad for some cheap ice cold cervezas.


If you're really serving a crowd, cook up some beans or ground beef, maybe some fresh guacamole, and spread out some taco fixings to go along with the chilaquiles. For bean tacos, chop up an onion and a few hot peppers and garlic, and combine in a fry pan with your favorite taco seasonings and a dash of sherry or Madeira if you have it. Let cook on medium in heated oil until onions are translucent. Add the beans and let go, shuffling often, until the onions are slightly caramelized/browned. You can add cooked meat instead if you prefer.


Turkey Chilaquiles
 
3-4 hot peppers of your choice, minced
1 c turkey stock
1 lb roasted turkey, shredded (about 4 cups)
1 c gravy (If I made this again I would go for 1 1/2 cup gravy and 1/2 cup stock for added thickness)
1 t ground cumin
8 oz tortilla chips (about 8 cups)
2 T olive oil
6 eggs
Cilantro
Homemade salsa


Instructions

1. Combine turkey stock and peppers in a saucepan and bring to a boil. Reduce heat and simmer, covered, for 20 minutes. Remove from heat and cool slightly. Place mixture in a blender or food processor and process until nearly smooth. 
2. Transfer mixture back to the saucepan. Stir in shredded turkey, gravy and cumin, and cook over medium heat until heated through.
3. Cook eggs until over-medium. In a large mixing bowl, toss together the tortilla chips, turkey mixture, cilantro and homemade salsa. Serve immediately on a platter with the eggs presented on top.


Keep your eyes on Trailbraising for an upcoming guest post by Michael Boland, resident 30605 salsa specialist.

Wednesday, October 20, 2010

Mushroom Risotto and Old-Fashioneds

Lately I just cannot get enough of mushrooms. I also happen to be a huge fan of risotto, a meal that I feel strikes the perfect balance between seemingly fancy but also really easy to make taste delicious. Also, there are so so many excellent variations. So when I saw this recipe on The Kitchen Sink I knew immediately I had to make it that night. I picked up some Brussels sprouts to accompany the risotto and some bitters and bourbon for some Mad Men style Old Fashioneds, Don Draper's drink of choice.


Mushroom Risotto

1 tablespoon unsalted butter
2 tablespoons extra virgin olive oil, divided
2 1/2 cups sliced mushrooms (about two little cartons)
1/2 large onion, diced
2 shallots, minced
3 garlic cloves, minced
1 tablespoon fresh thyme leaves or dried thyme, plus more for serving
kosher salt
freshly-ground black pepper
1 cup arborio rice
1 cup dry white wine
4 cups vegetable stock
1/4 cup freshly-grated parmesan, plus more for serving

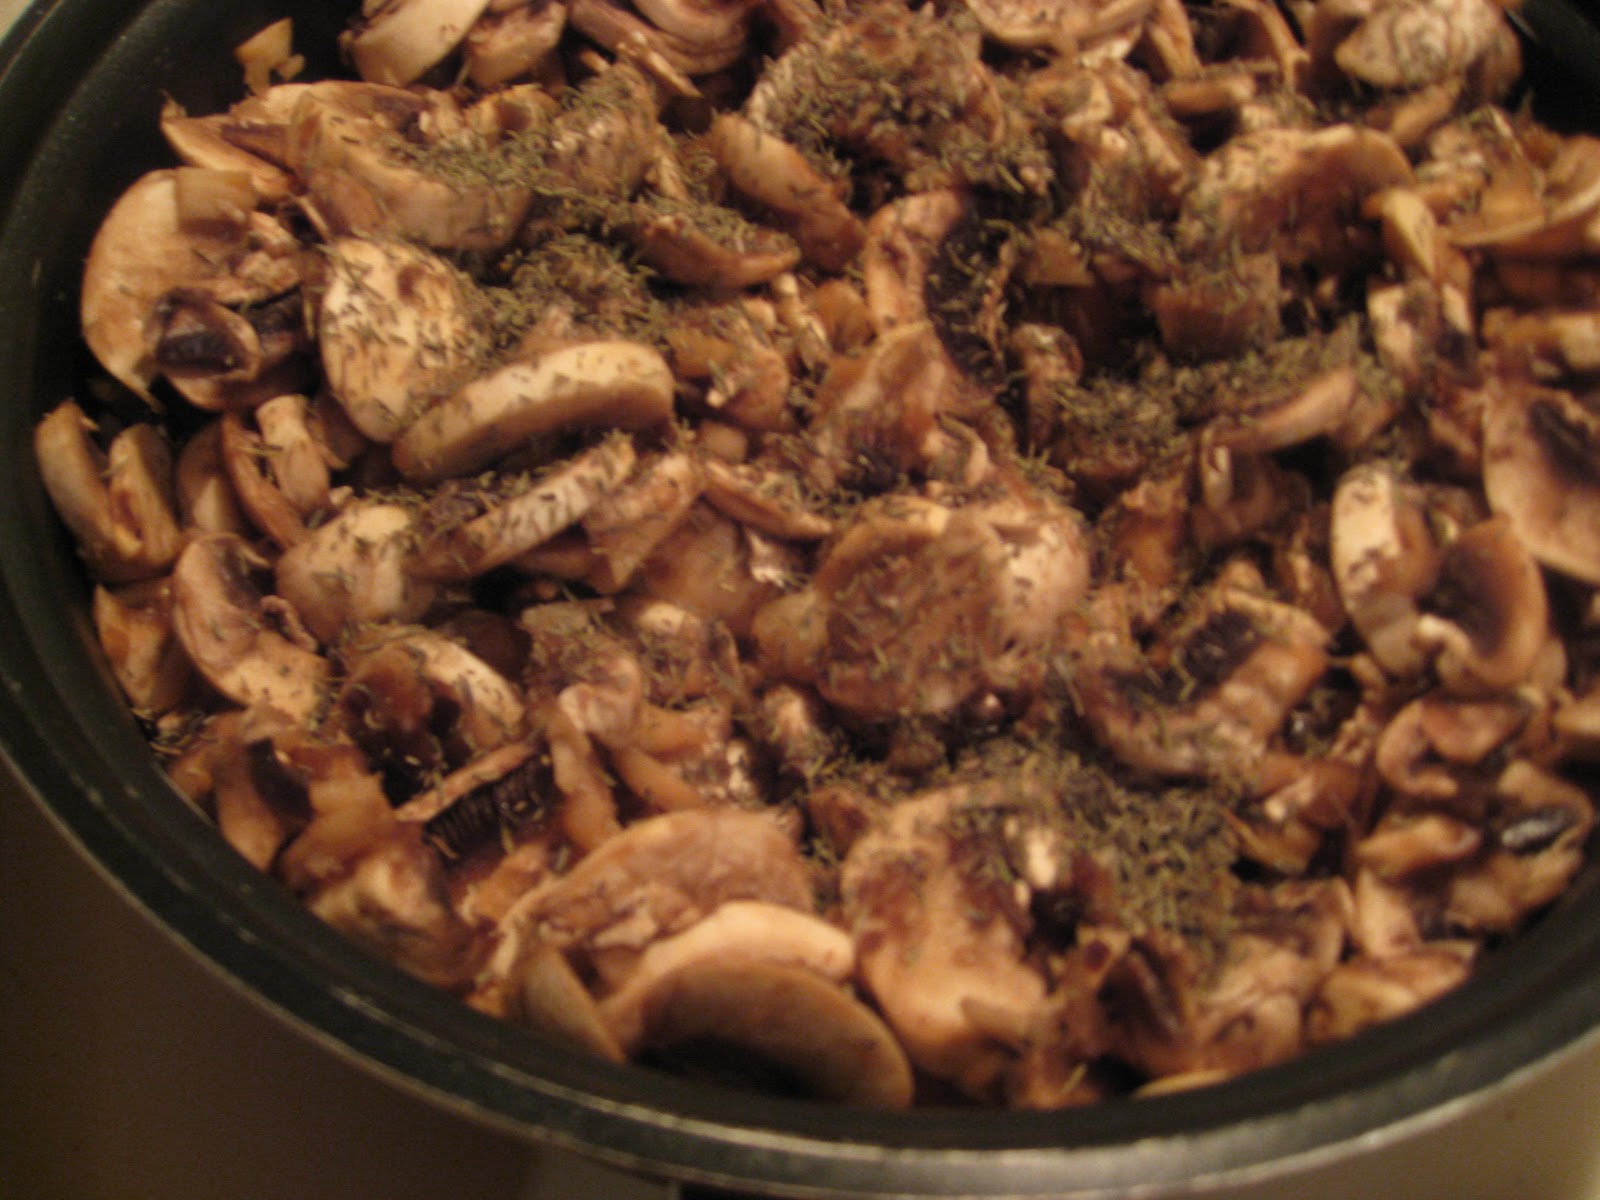
1. Melt the butter and 1 tablespoon of the oil a skillet over medium heat. Add the sliced mushrooms and thyme, season with salt and pepper, and cook, stirring occasionally, until the mushrooms are browned and soft.
2. If the mushrooms get too watery, drain the pan and scrape the mushrooms into a bowl to reserve for later.
3. Heat the remaining tablespoon of oil.  Add the onion, shallots and garlic, stirring occasionally, until the onions are translucent and softened.
4. Add the arborio, season with salt and pepper, and stir for about a minute.
5. Add the wine, and stir constantly until the rice has absorbed the wine.
6. Warm the vegetable broth. Laddle in about 1/2 cup of broth every time the rice absorbs what's already been added. Slowly but surely the rice will thicken.
7. When the rice is cooked to your taste, add the cooked mushrooms and grated cheese. Serve immediately, with additional fresh thyme and grated cheese, if desired.


Brussels Sprouts 
This recipe was recommended to me by my father.

Small brussels sprouts, however many you desire
1 tablespoon extra-virgin olive oil, plus more for rubbing
fine-grain sea salt and freshly ground black pepper
1/4 cup parmesan
1. Wash the Brussels sprouts well. Trim the stem ends and remove any ragged outer leaves. Cut in half from stem to top and make a small X in the base of the stem. This is important because the leaves cook faster than the stems which causes the bitterness that most people dislike about Brussels sprouts. This trick maintains the buttery sweetness that makes these veggies utterly delectable.
2. Boil a pot of water and fill a bowl with salted ice water. Blanche the Brussels sprouts for about 3 minutes in the boiling water then drop the in the salted ice water.
3. Heat 1 tablespoon of olive oil in your largest skillet over medium heat. Don't go too hot.
4. Rub the Brussels sprouts with olive oil. Place the Brussels sprouts in the pan flat side down in a single-layer, sprinkle with a couple pinches of salt, cover, and cook for roughly 5 minutes.
5. This is optional: once just tender, uncover, turn up the heat, and cook until the flat sides are deep brown and caramelized. Use a metal spatula to toss them once or twice to get some browning on the rounded side.
6. Season with more salt, a few grinds of pepper, and some grated cheese. Eat immediately if possible and reheat for snacks later.


Now for drinks...

 Old-Fashioned


  • 2 dashes aromatic bitters
  • 2 dashes of rhubarb bitters (recommended by the Five Points Bottle Shop guy)
  • ½ tsp sugar dissolved with water and bitters
  • 1½ oz of bourbon
  • 1 cherry (optional)
  • 1 orange slice
  • Some orange juice squeezed in
  • 1 lemon wedge

Instructions

Fill glass with ice. Add cherry, orange slice and lemon wedge. Pour in bourbon. Serve in a rocks glass over ice.

If you prefer, you could also make a whiskey sour or mint julep using the same bourbon you've already purchased. Salut!